Replacing a wired cmos battery safely with a CR2032
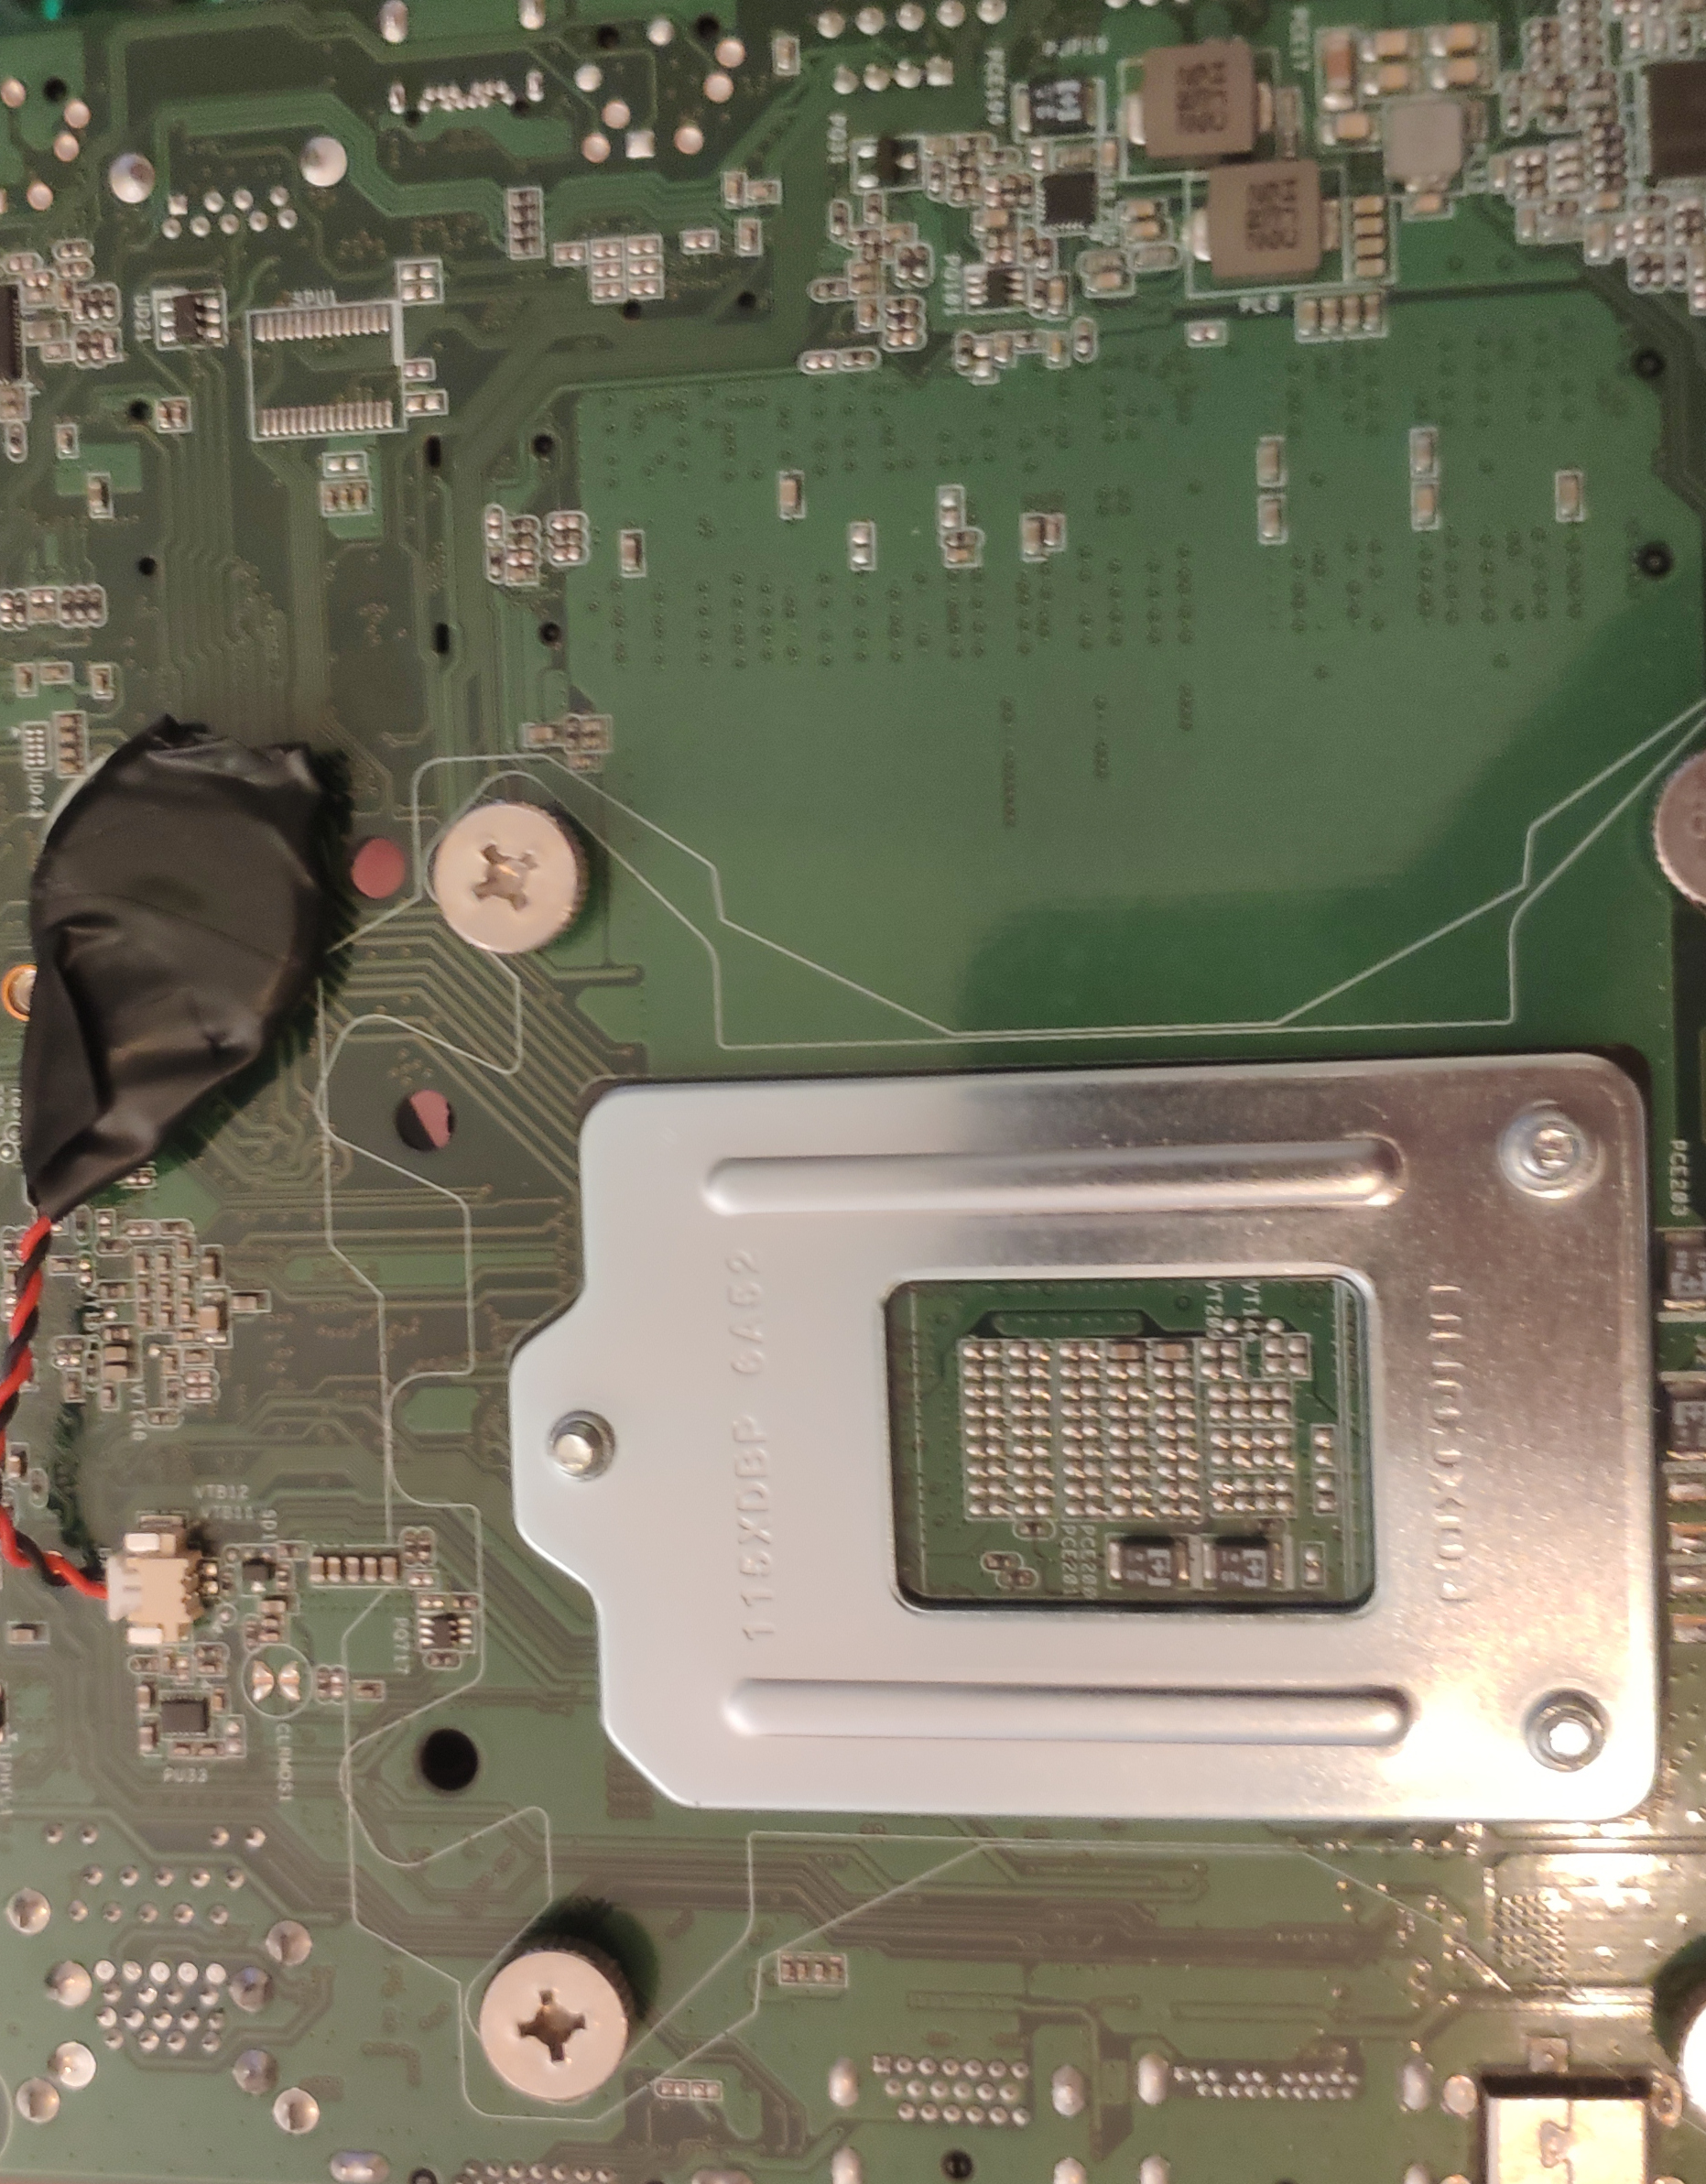
While setting up some new nodes for my soon-to-be Kubernetes cluster I discovered one node has an empty CMOS battery.
Not ideal when the bios settings keep resetting meaning it won’t power on after a power outage.
Well no problem I have enough CR2032 batteries, so this should be easy… 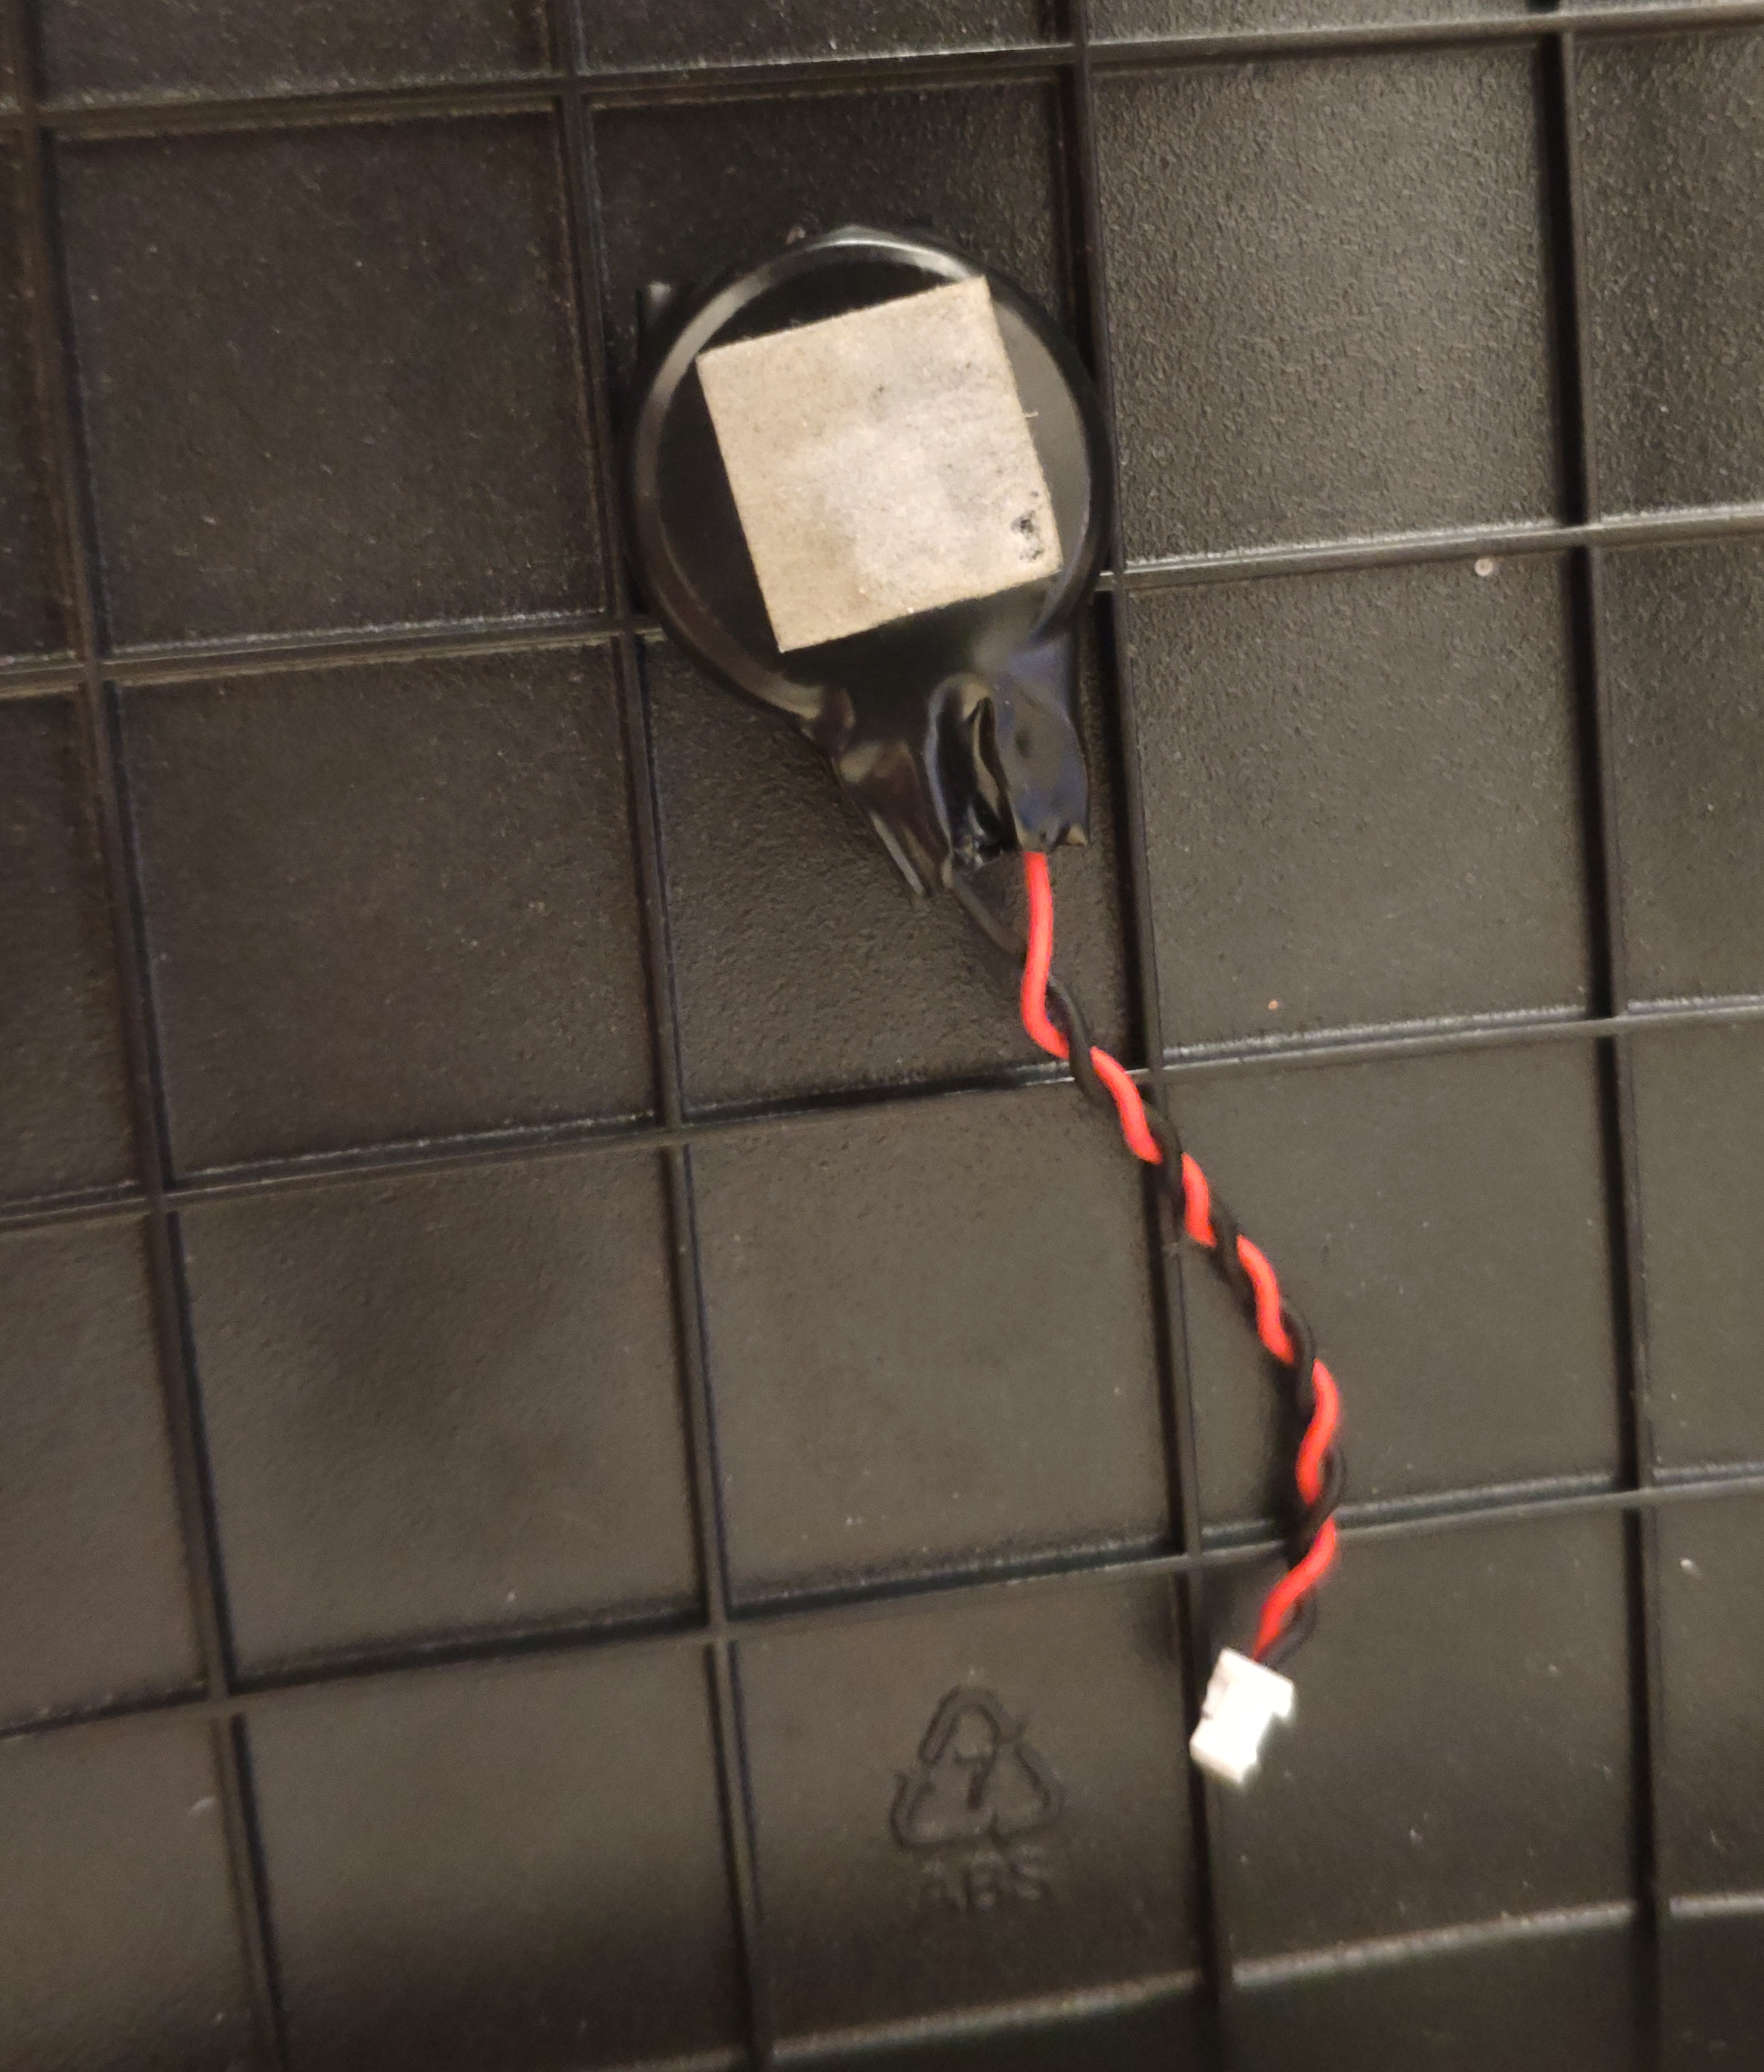
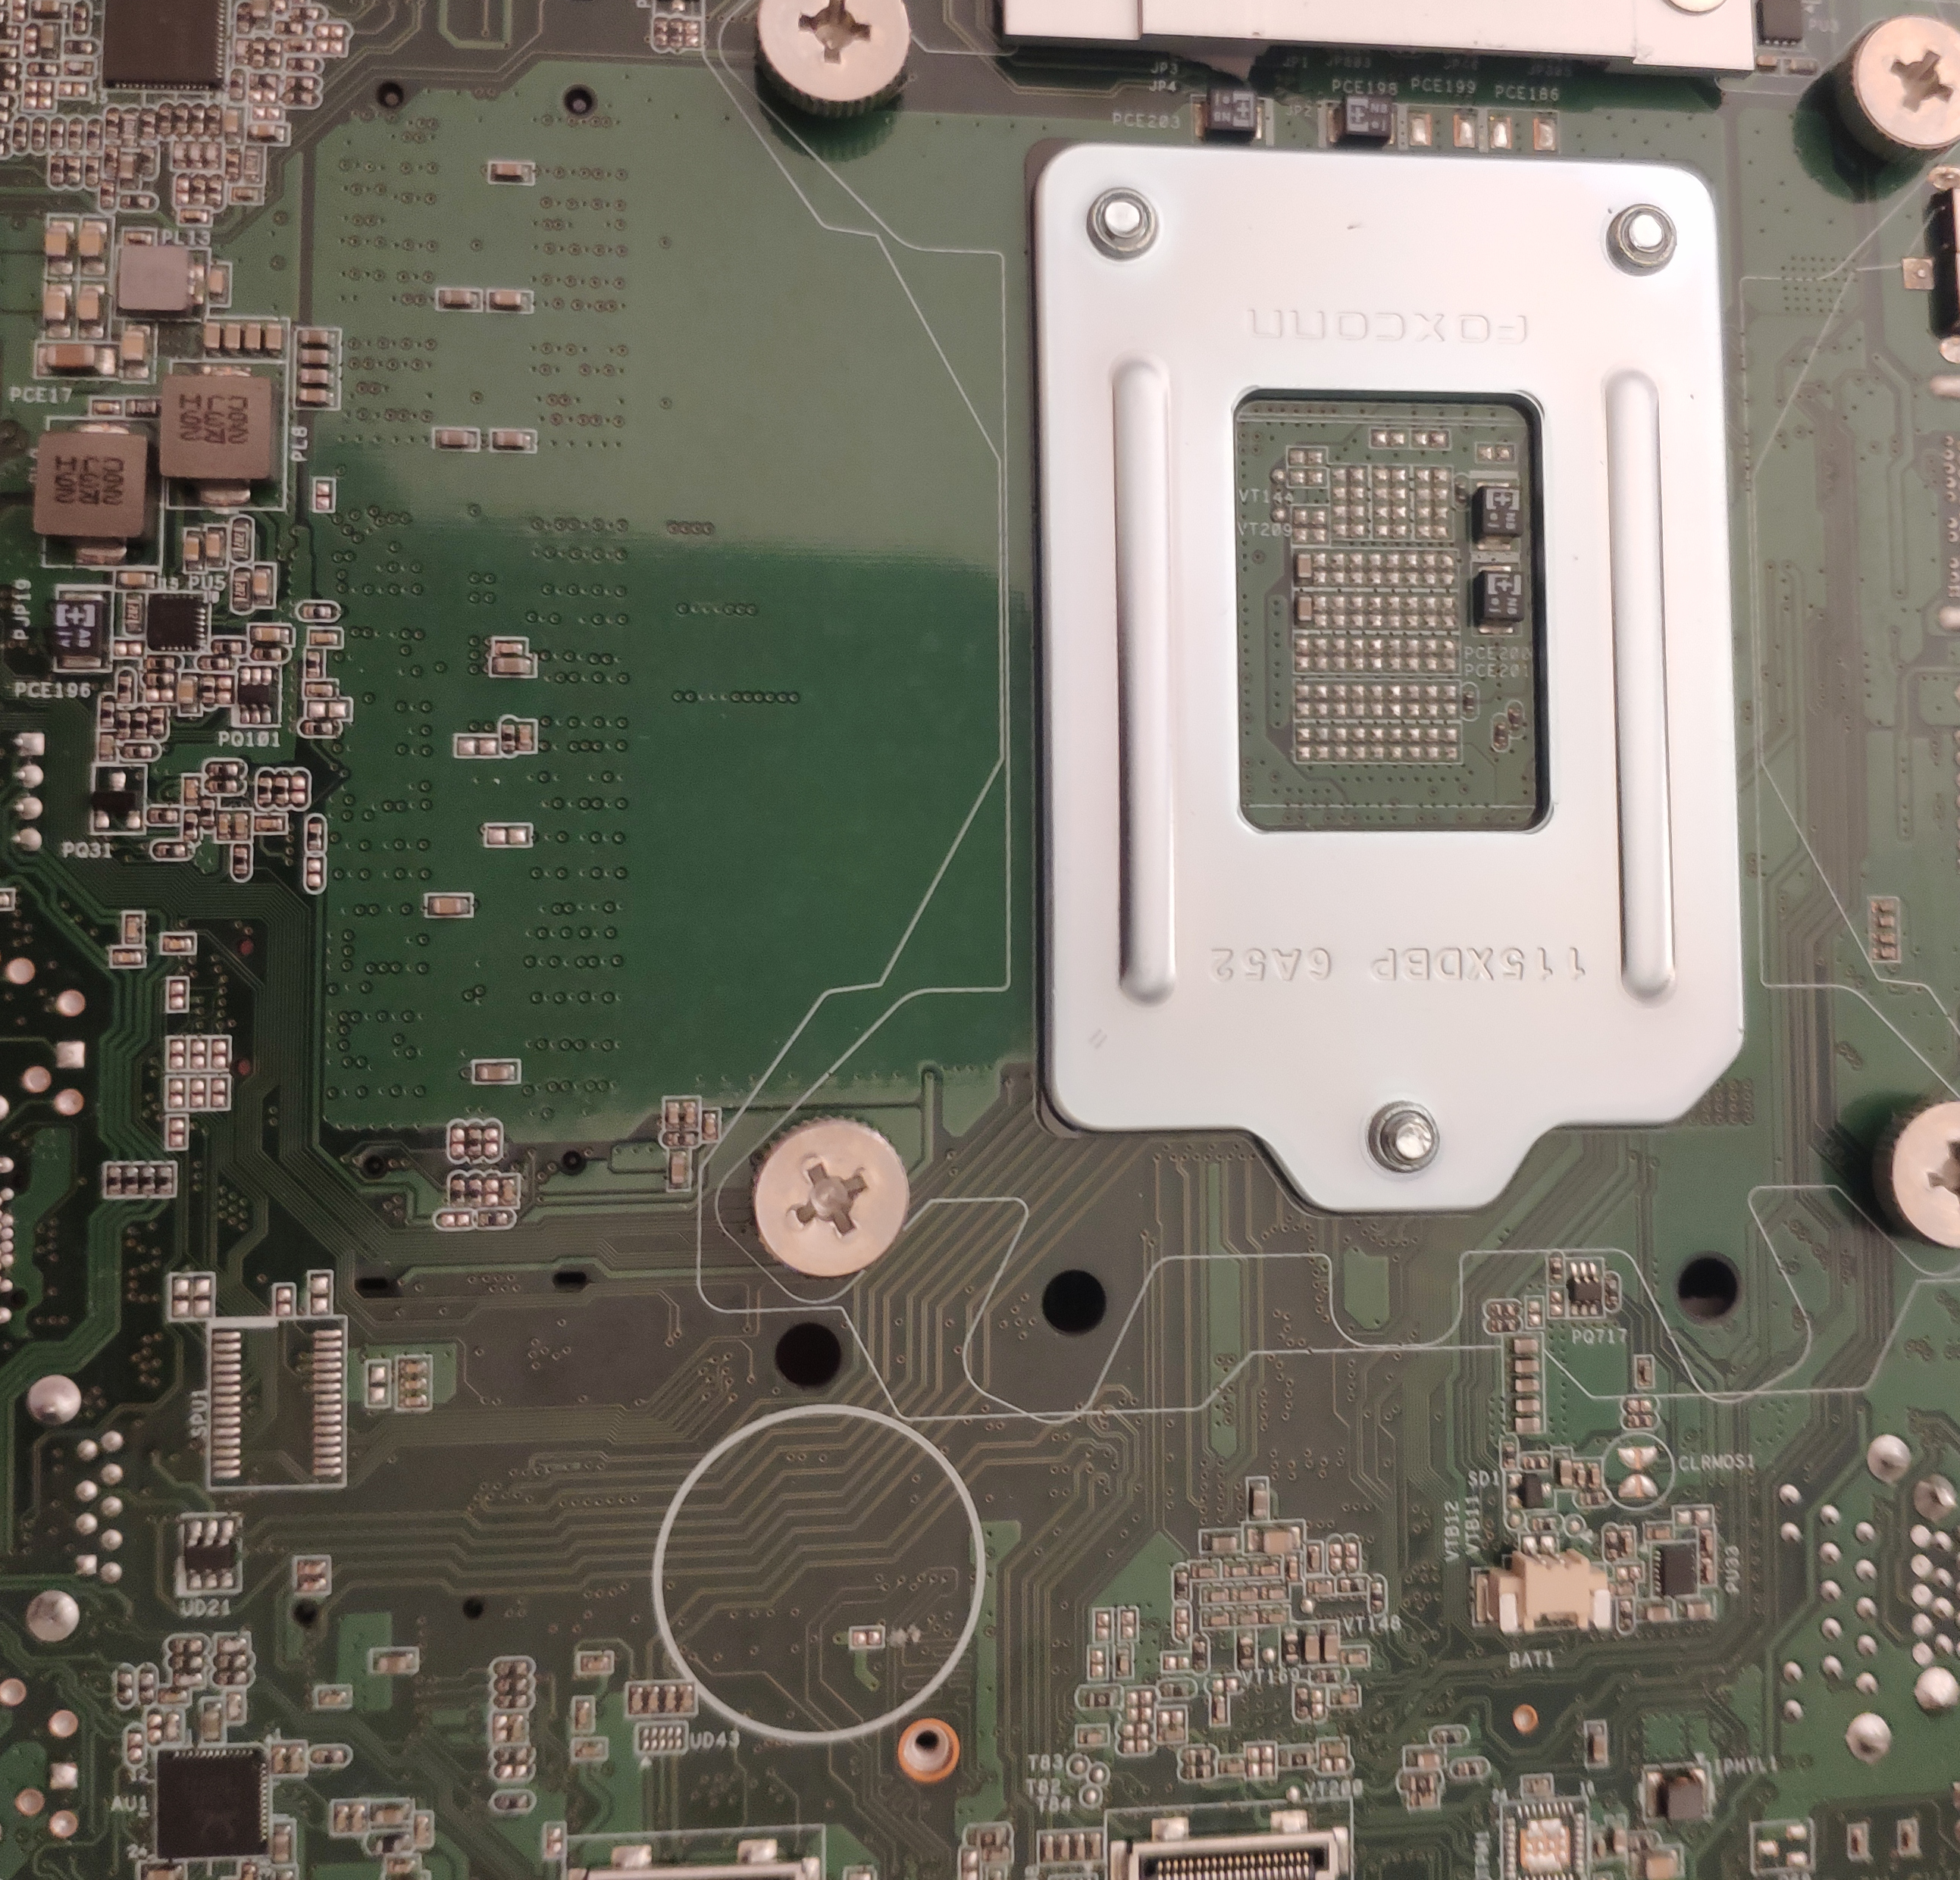
And it is not easy, this DeskMini 110 has a wired CMOS battery, I do not have one on hand. On top of that the price compared to a standard CR2032 is ridiculous, I can buy 10 at IKEA for €1.99, most wired CMOS batteries I see start at €8.00. So I’d rather not wait for a new battery nor do I want to pay that much for a simple coin cell with some wires.
Some googling later and watching multiple videos I came to the following conclusions:
- DO NOT solder the coin cell, because it might explode.
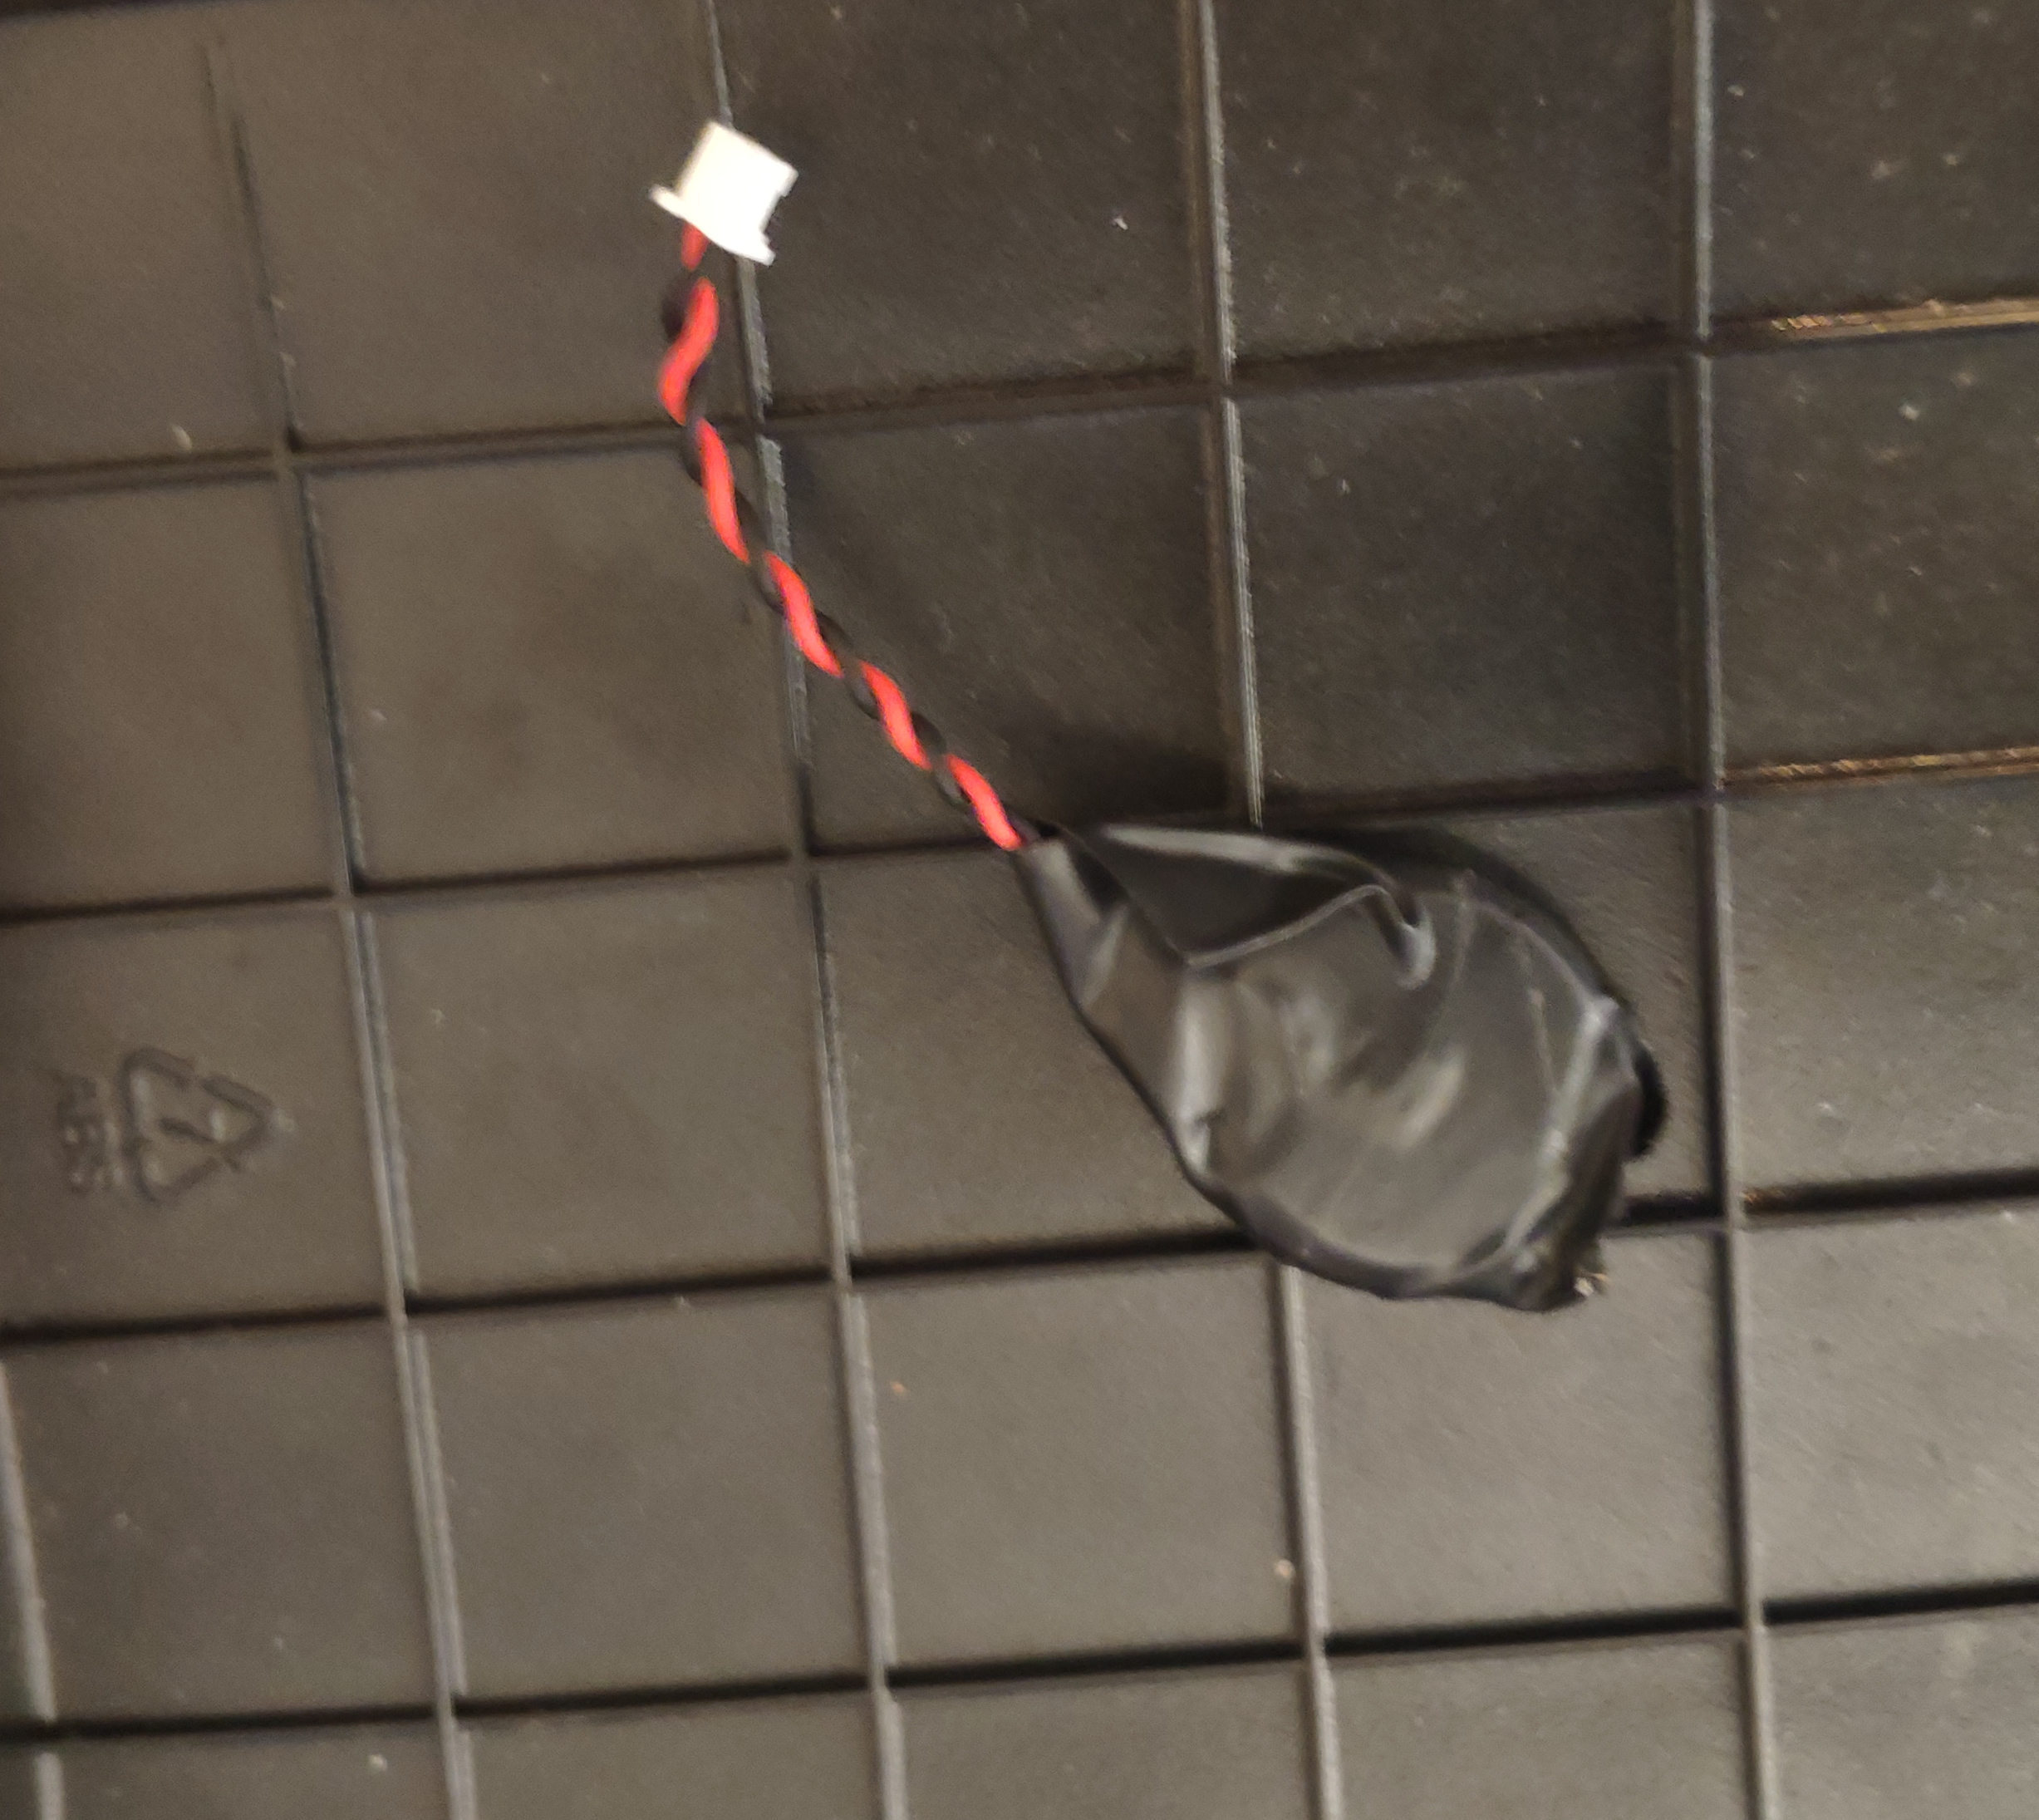
- The connections are spot welded on the coin cell, breaking them off gives us enough leeway to reattach them with tape.
Alright with these findings let’s start with replacing this battery with a simple CR2032.
First remove the protective film around the wired CMOS.
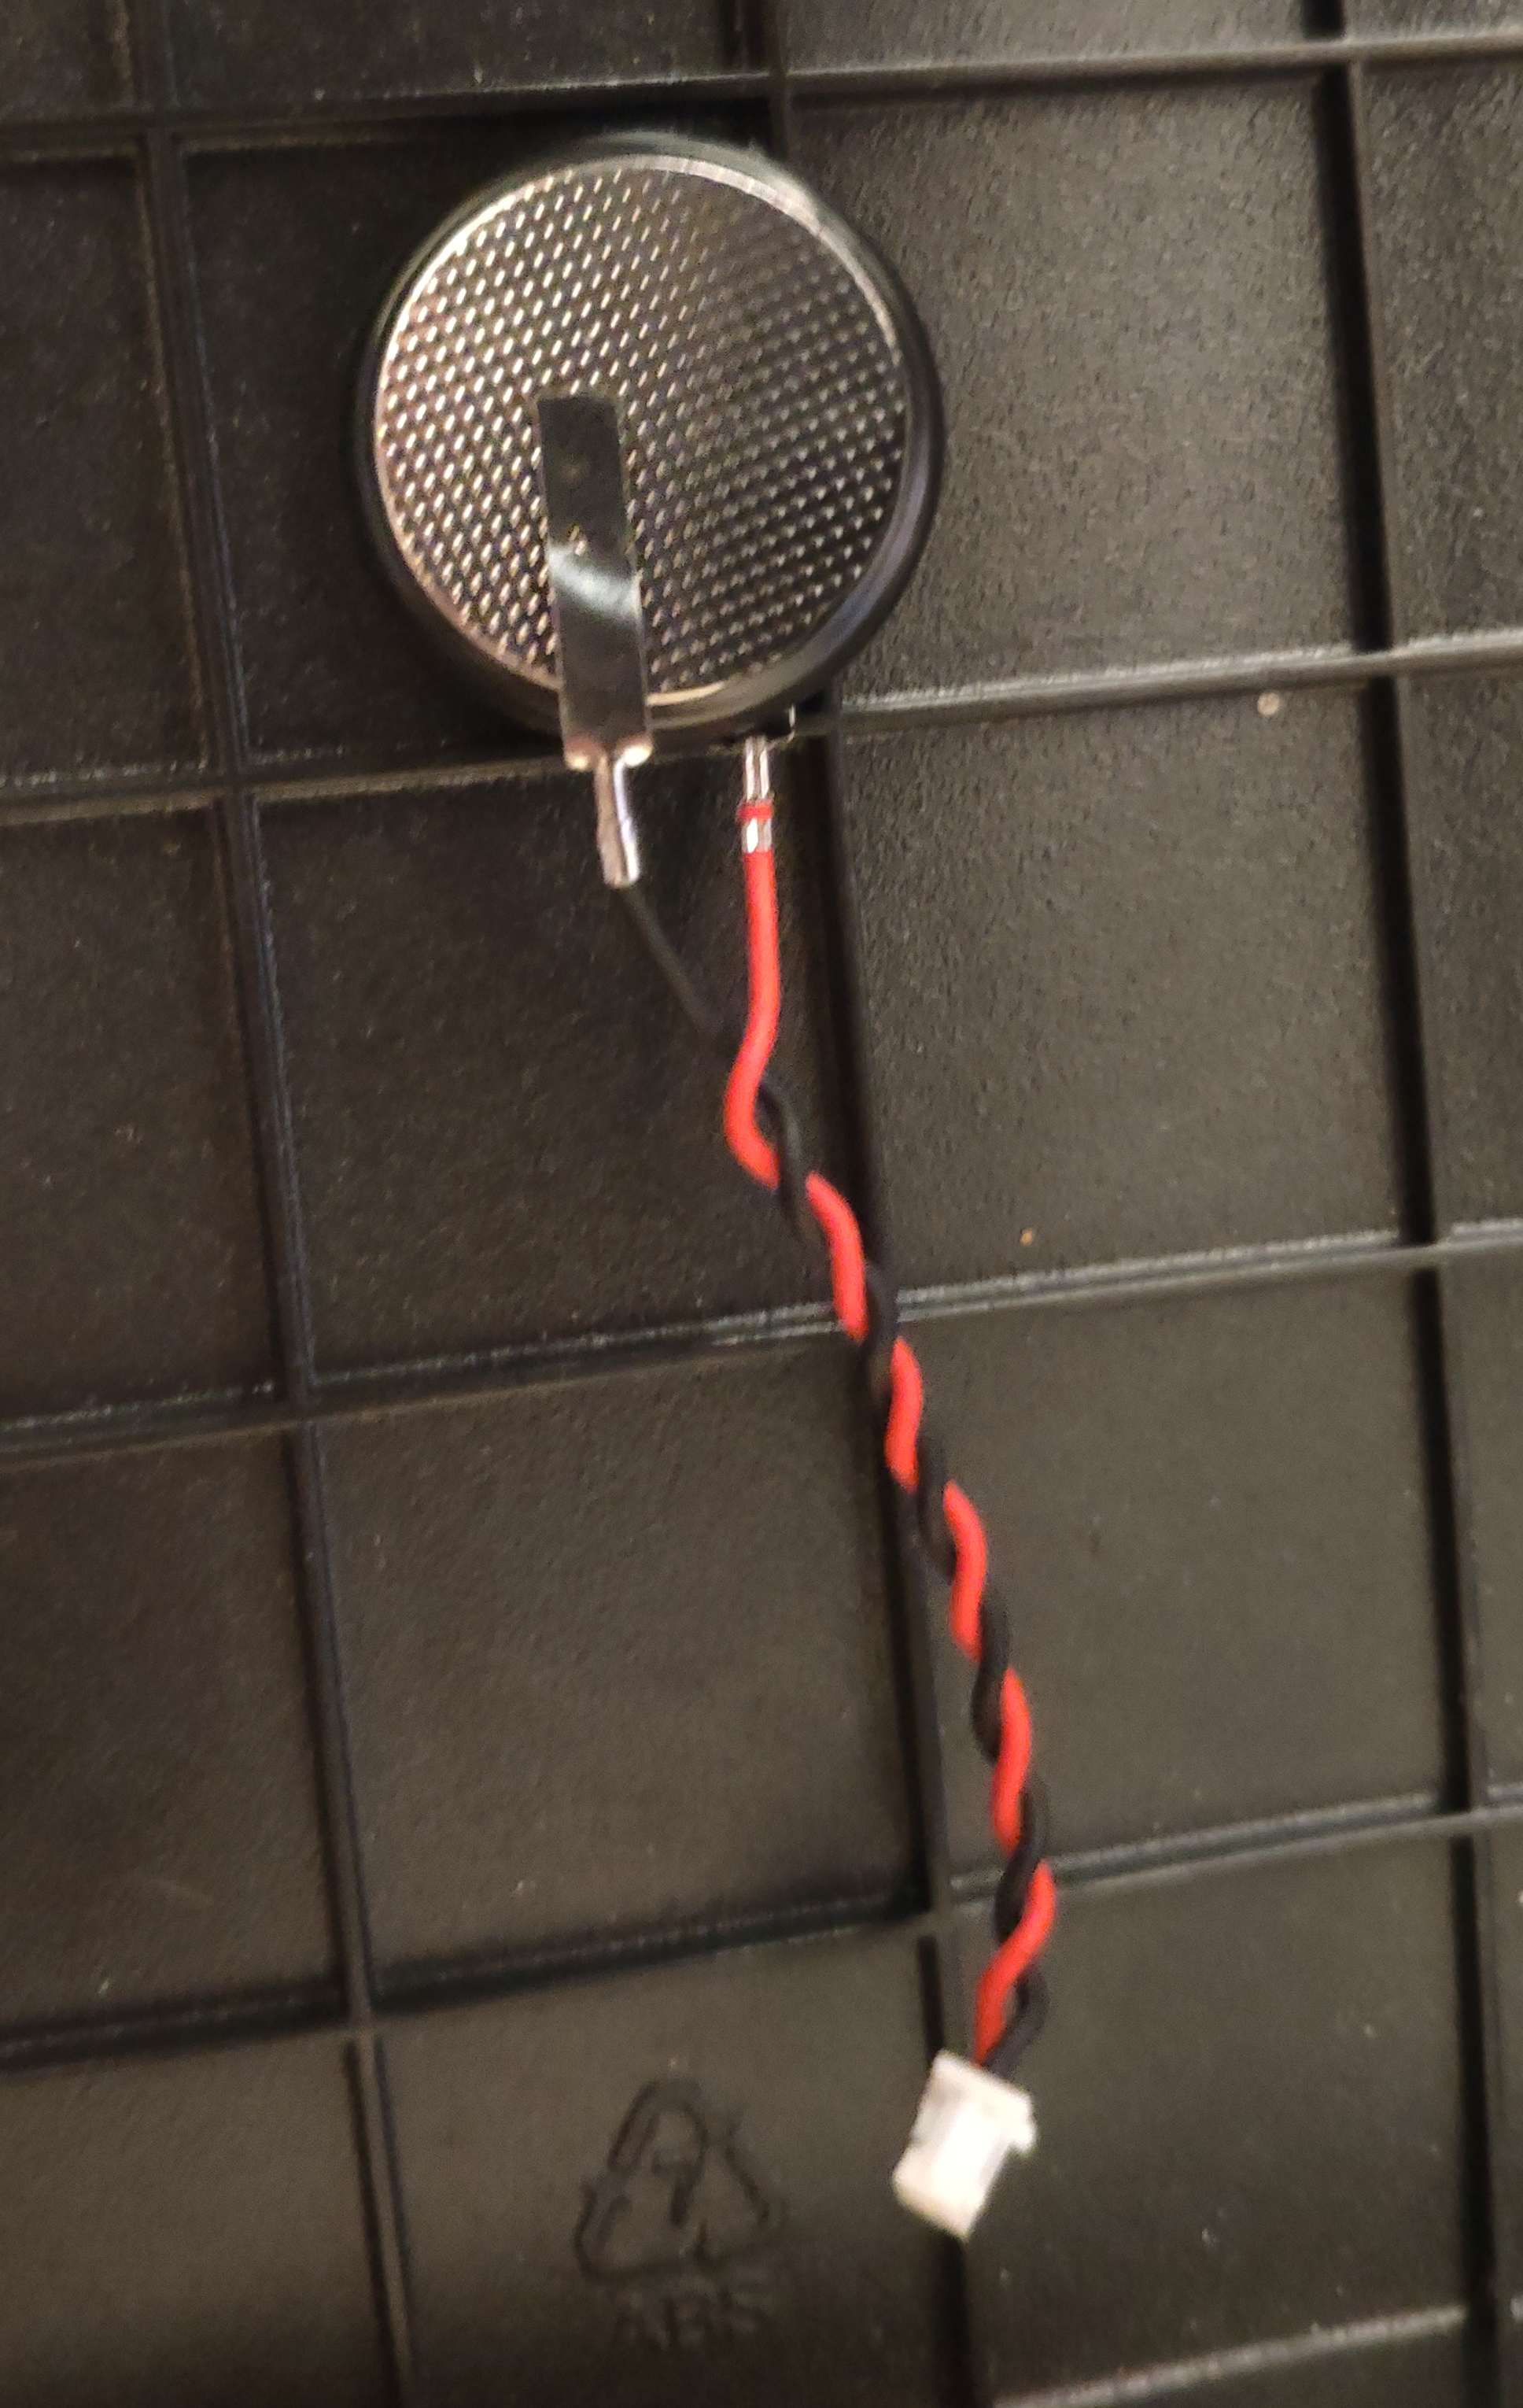
Now wiggle the connectors until the metal breaks, make sure the terminals are still sufficiently long.
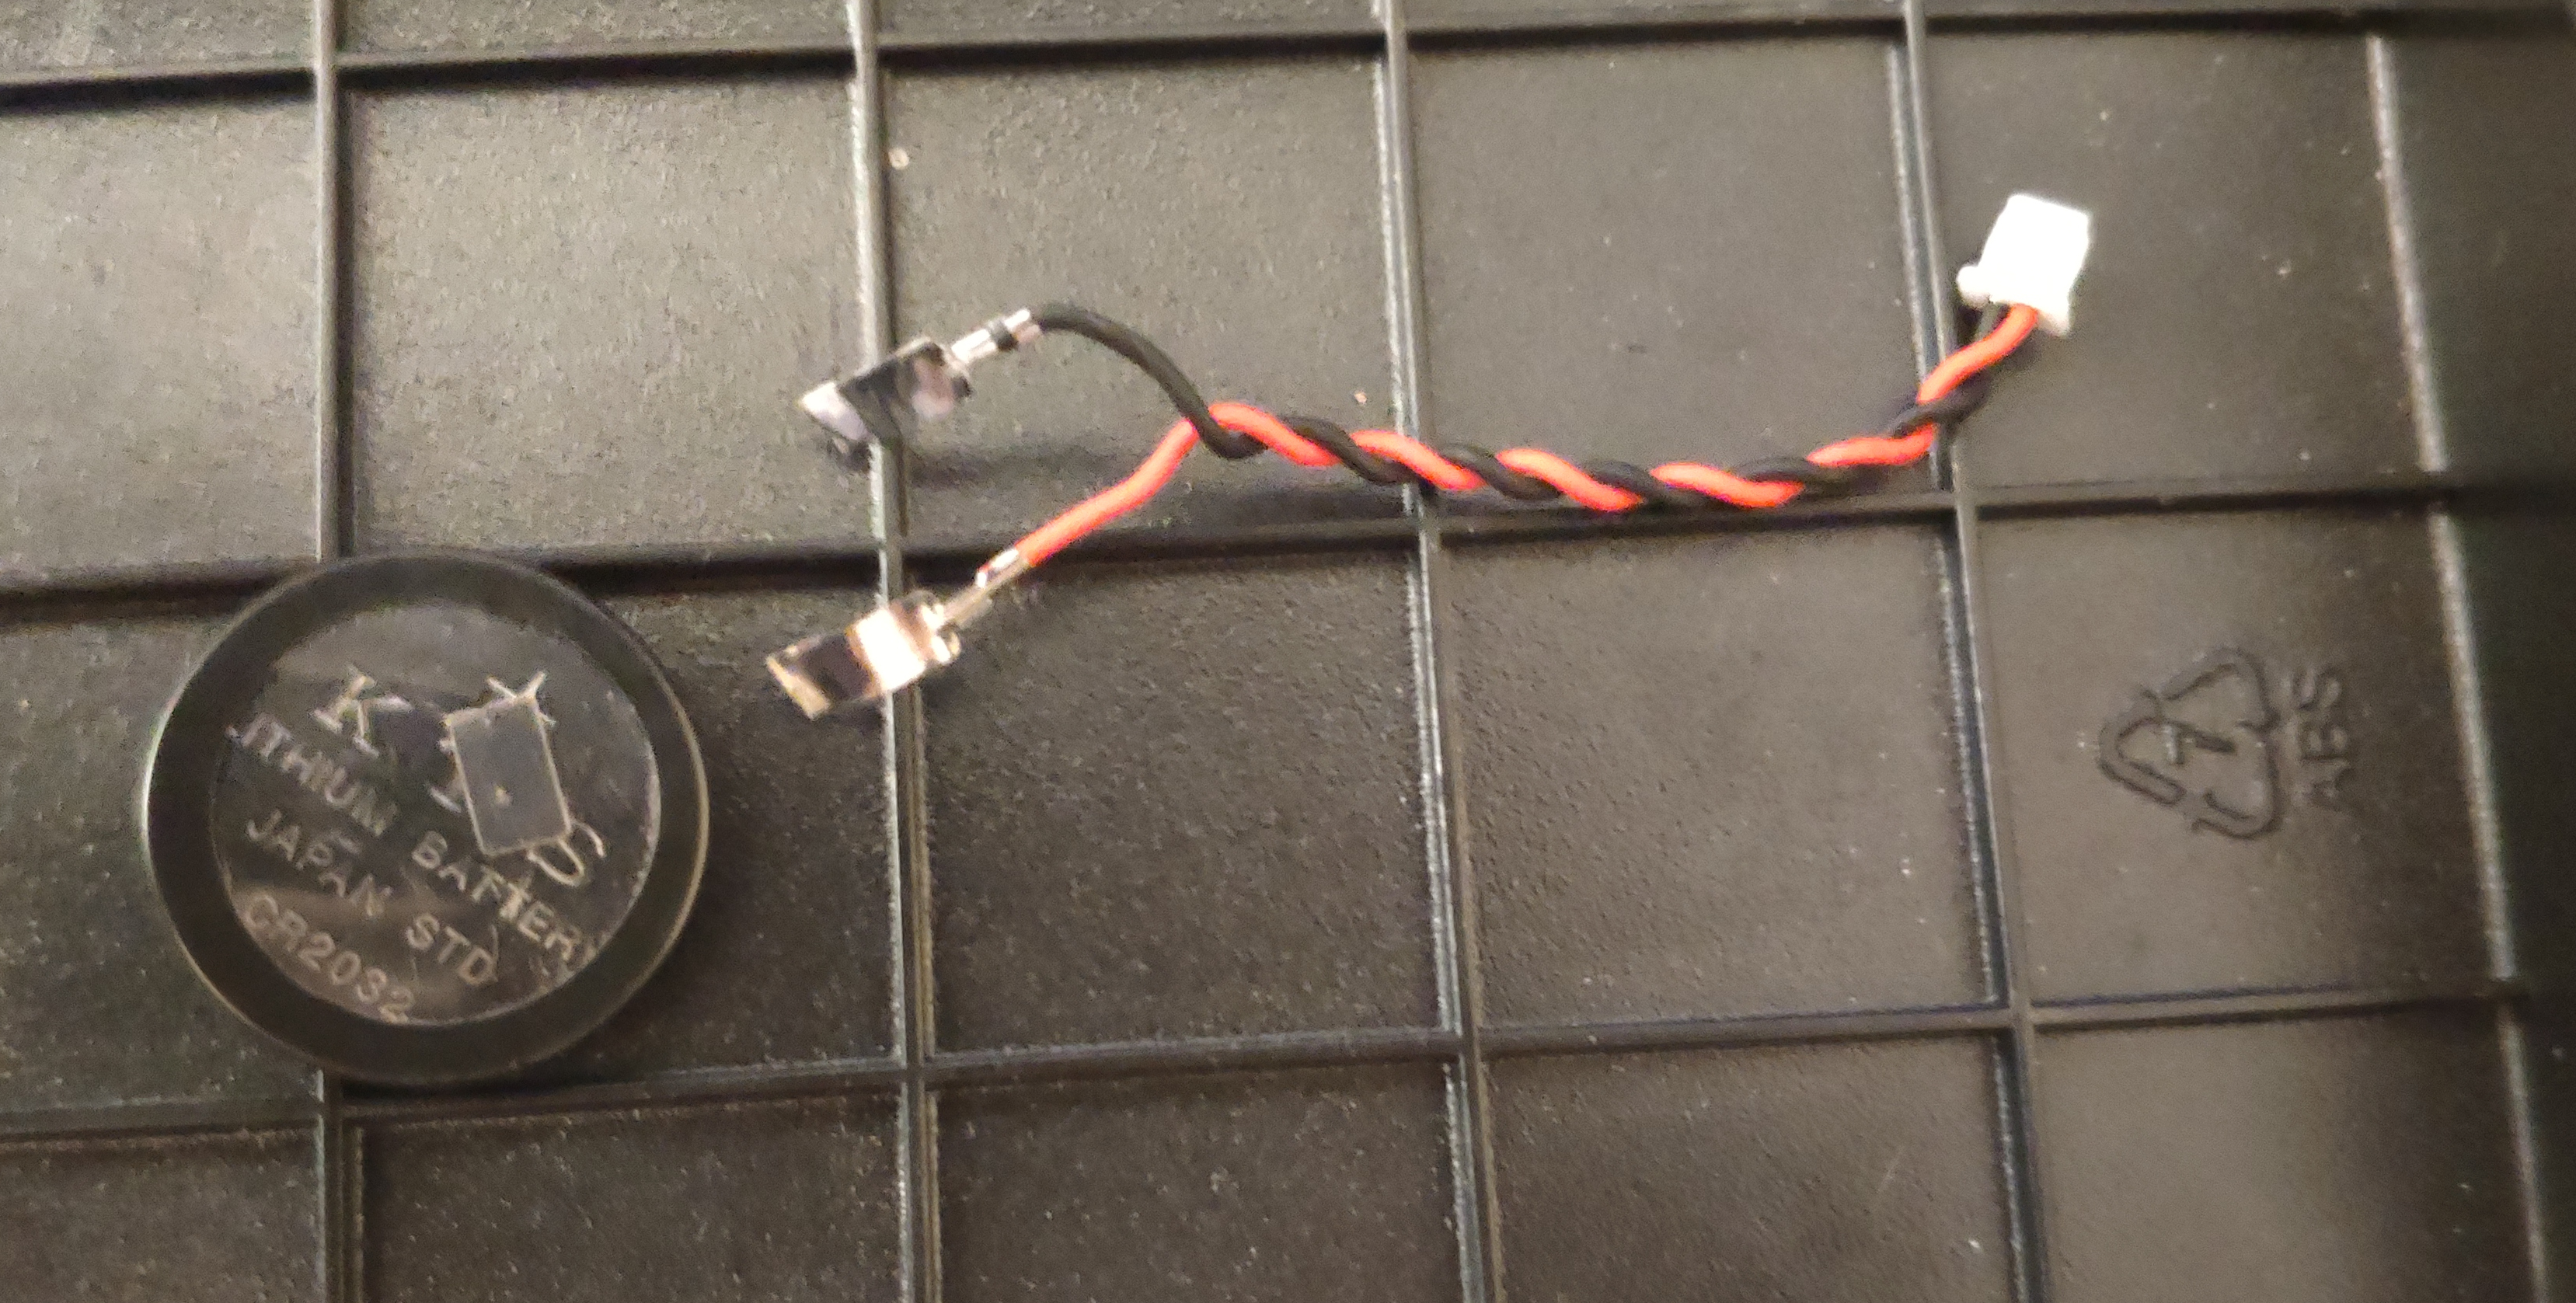
Alright time to get the new ingredients for our replacement:
- Isolated electric tape
- A new CR2032 (or a larger 3V coin cell if space permits)
- The torn off connectors
- Conductive tape like copper tape (I did not have this, so you could do without)

I also considered getting a larger coin cell because of a longer running time, and space wise it would have fit on my motherboard. But in the end it was too thick to actually fit, good I tested that first before creating the new CMOS.
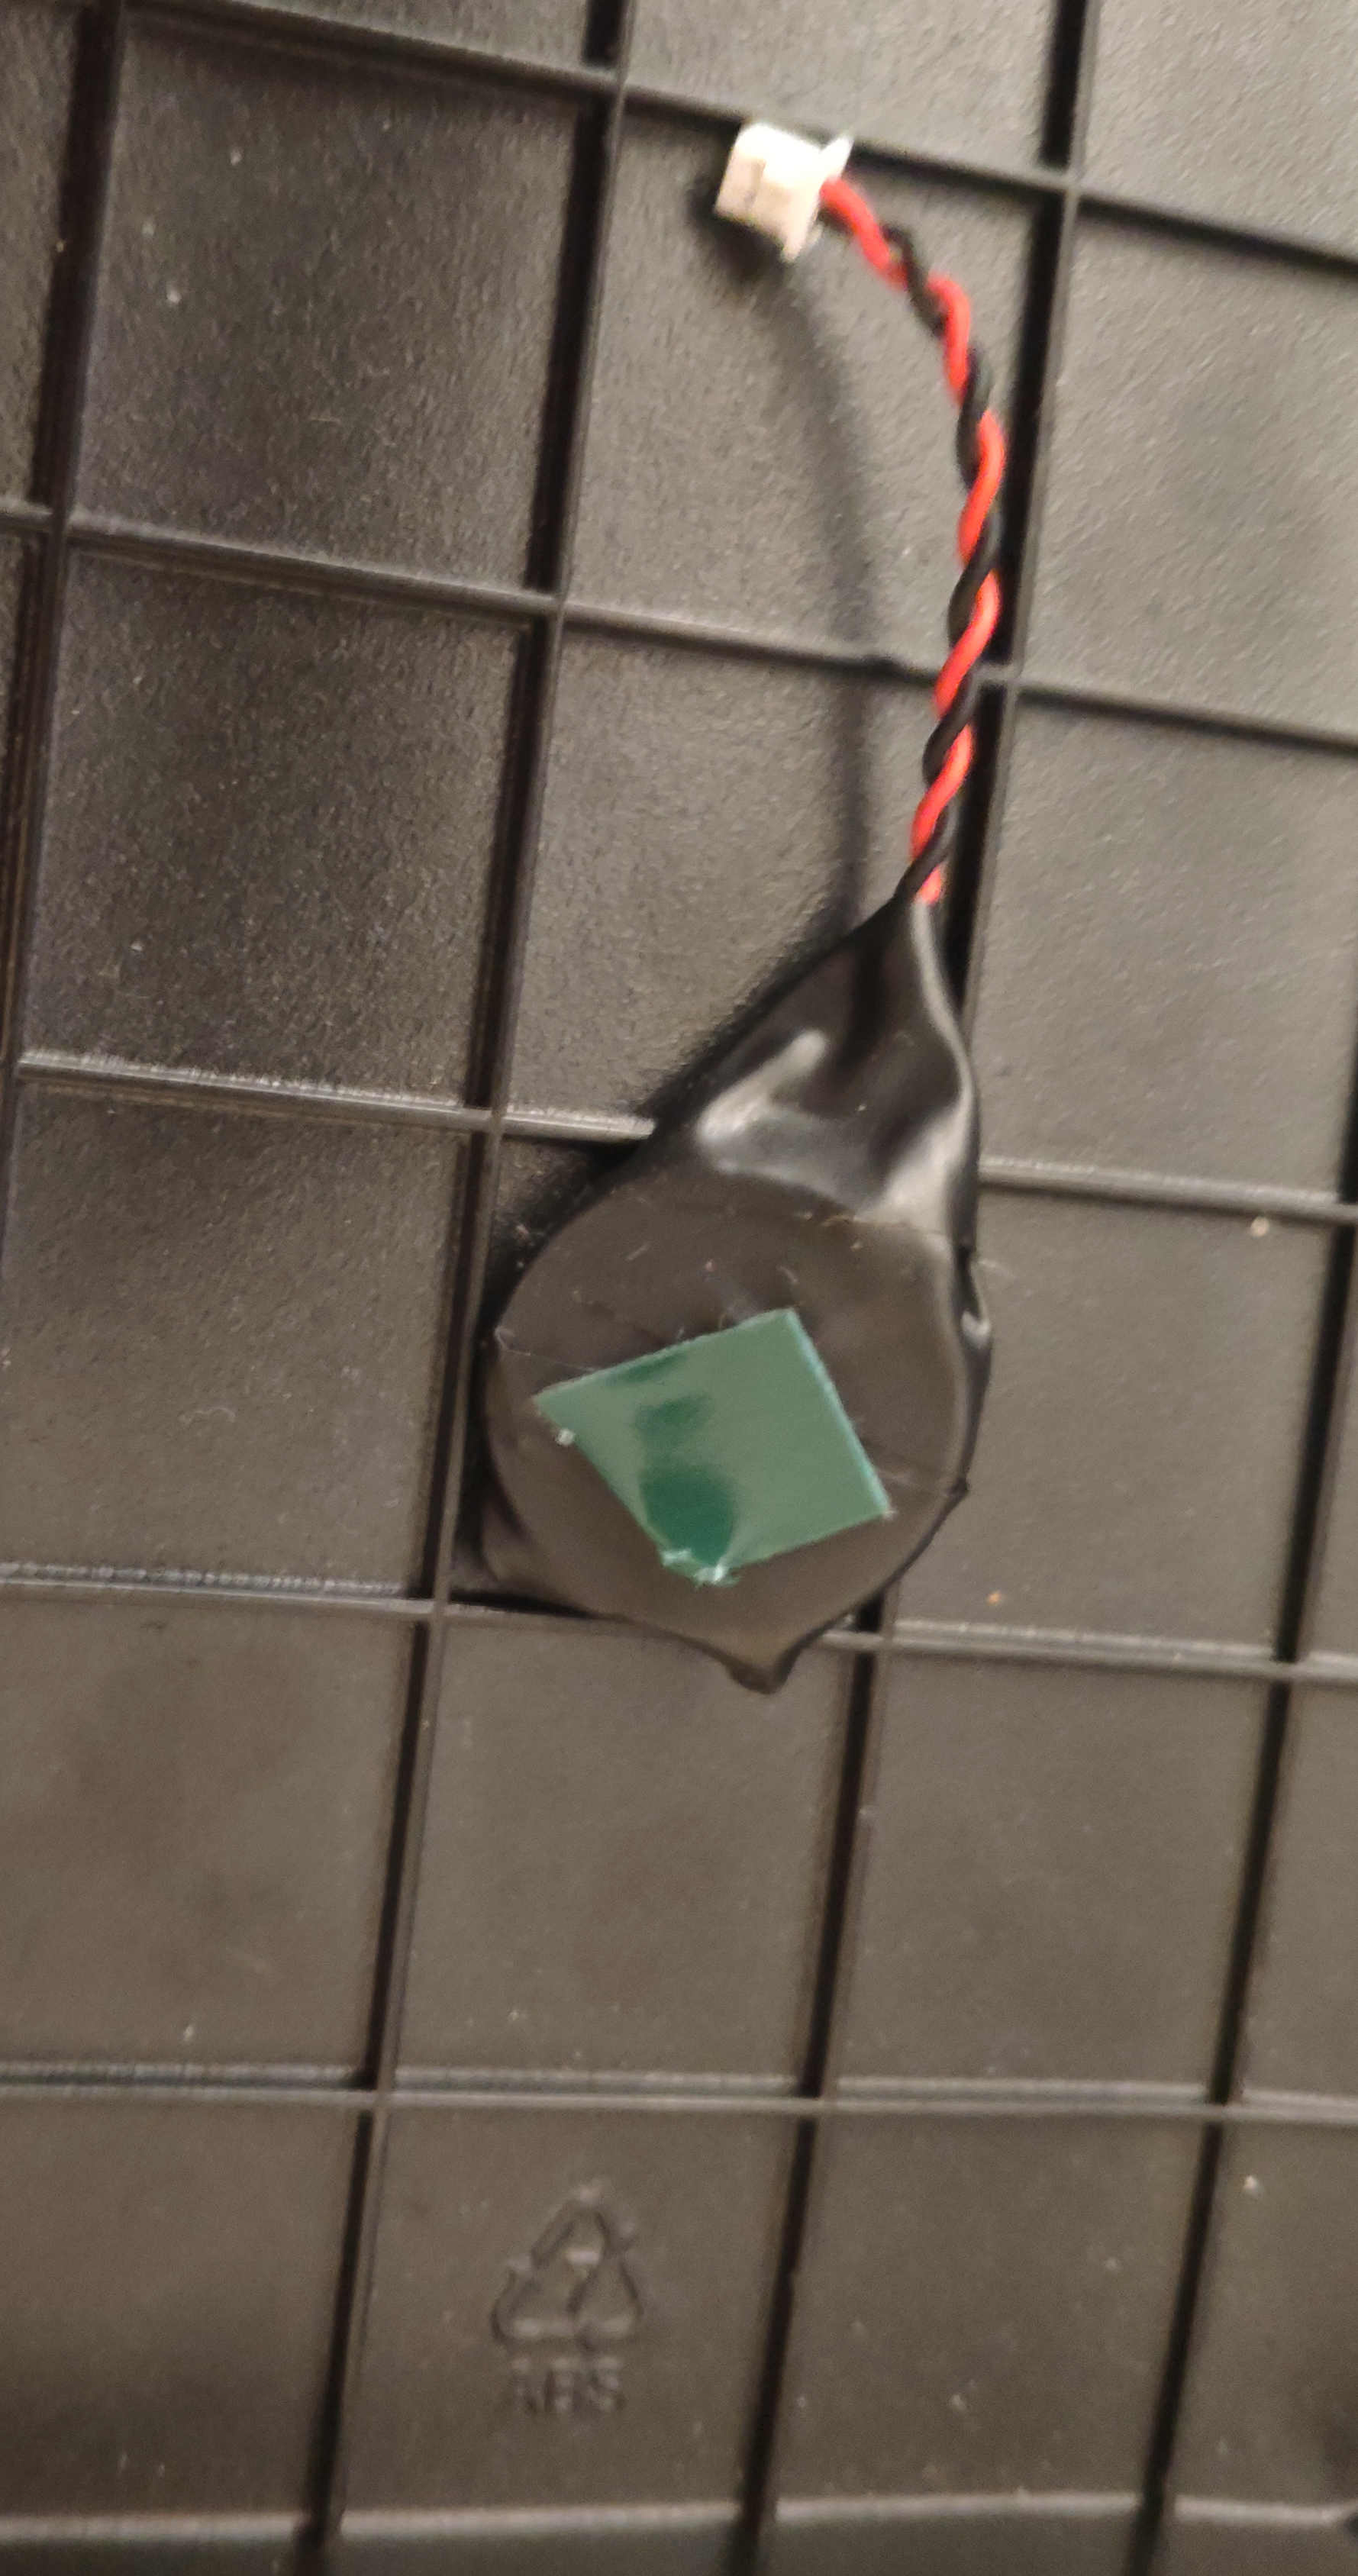
- Using your conductive tape/electric tape attach the terminals to the CR2032, red goes to + and black goes to —, flatten the terminal, so it makes proper contact with the coin cell. If you don’t have conductive tape it is fine but really make sure your terminal is connected properly.
- Now with properly connected terminals wrap your new CMOS battery completely with tape, make it look like the film you tore off from the old CMOS.
Alternatively you can also use heat shrink tubing to get the same result (Make sure you don’t overheat the battery though).
With that we have the following result:
Before we get to installing your new battery you might need some double-sided tape, only if the original one had this too. For mine, it did, so I installed it like this:
Only thing left is reinstalling the battery, this is easy enough by just reseating the connector as well as attaching it with tape.